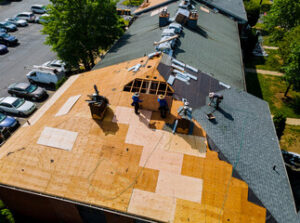
Whether you’re replacing a damaged roof or just adding curb appeal, a new roof is a major home project that requires professional assistance. Roofing installation involves steps like material delivery, old roof removal and wood decking inspection. Contact Corpus Christi Roofing CO for professional help.
You’ll choose from a variety of roofing materials, including three-tab asphalt shingles, metal sheets, shakes and clay tiles.
There are many types of roofing materials, each offering different advantages and benefits. Your choice depends on your budget, location and style preferences. You should also consider environmental factors and local weather patterns.
A common option is asphalt shingles, which offer affordable protection. They come in a variety of colors and can be installed on low- or steep-incline roofs. Rolled roofing is another inexpensive option. It’s a popular choice for homes with lower-incline roofs because it can be rolled out and hammered down easily, unlike shingles, which have to be applied one at a time. However, rolled roofing should not be hammered down on flat roofs; doing so can cause water leaks.
Slate tiles offer a natural, classic look that’s durable and fire-proof. They’re also eco-friendly and long-lasting, with a lifespan of 50 to 200 years. Clay tiles are another durable roofing material that comes in a wide range of styles, including curved shapes and Spanish-style arches. They’re heavier than shingles, so they require additional framing during installation.
Metal roofs are long-lasting and durable, but they’re more expensive than shingle or tile roofs. Their complexity demands that a roofer has extensive experience installing them. Metal roofs are made of panels that must be joined together precisely for a weather-tight seal.
A reflective membrane is an alternative to shingles for flat roofs. It helps to cut down on the amount of heat absorbed by a home and reduce energy costs. It’s important to find a contractor who has experience installing reflective membranes.
Tear Off
When replacing your roof, you have the option to either install a new layer of roofing material over the existing roof (roof overlay), or to completely remove the existing roof materials and replace them with a new, upgraded roof (roof tear off). This choice has a significant impact on the durability, lifespan, and overall value of your home.
A complete roof replacement can help you address underlying issues, improve your property’s value, and protect your home from moisture damage. However, a tear-off can be more expensive than a roof overlay, and requires careful preparation to ensure it is carried out effectively.
To avoid costly mistakes, the best practice is to hire a professional roofing contractor with extensive experience with the process of a roof tear off. This will give you peace of mind that the job will be completed correctly, and ensure that your home is safe from any falling debris during the tear-off process.
During a roof tear-off, a team of roofers will carefully remove the old shingles and underlayment from your rooftop to expose the roof deck. They will then remove any nails from the exposed area, and replace damaged sections of the roof deck with plywood. The resulting waste can be safely disposed of by the contractor, and should never be left to pile up around your home.
In addition to removing the old roofing materials, the tear-off process will also include reinstalling any metal gutters, eave drip edges, and pipe boot flashing. To prepare your property for the tear-off, your contractor will clear the work area, and cover any plants or landscaping with tarps. The tarps will catch any debris, and can be rolled up and thrown away once the tear-off is finished.
Underlayment
The process of installing a roof starts way beyond the surface or layer of shingles you can see. The underlayment is the first step that keeps the structure dry, protects framing from moisture, and helps the shingles stay in place.
The underlayment consists of several different materials, and the type used will depend on local building codes and the preferences of the contractor. The most common is an asphalt-saturated felt paper, which is usually thicker than roofing underlayment and provides a high level of water resistance. Other options include cork, which can provide natural mold resistance and reduce sound. Lastly, there are synthetic underlayment solutions that can be made from fiberglass or polyester. These products are less expensive than the felt paper, but they may not offer the same level of protection.
Before laying the underlayment, contractors will lay a metal drip edge along the eaves and rakes of the roof. This helps to keep water from running under the shingles and into the roof decking, as well as prevents it from leaking into the house.
Some roofing brands require that a special leak barrier be installed in areas where two roof planes meet, around penetrations, and on slopes where the shingle thickness can be reduced. This self-adhesive waterproof membrane adheres tightly to the bare roof sheathing and seals around nails driven through it. It can be purchased from roofing supply companies or home centers, and many major shingle manufacturers require that it be installed in order to qualify for their contractor workmanship warranties. Alternatively, a contractor can use a more traditional self-adhesive underlayment that is similar to sheathing paper and is designed for both wood and metal roofs.
Shingles
Shingles are what make up the surface of your roof and create the barrier that repels water, snow, ice, rain and other elements. They’re also a key component of a house’s exterior style and can pull your home’s architectural design together with color and material.
There are a few different types of shingles available, and your roofing contractor will help you select the one that best suits your needs. Asphalt shingles are the most popular and affordable option, providing reliable protection for your home. They come in two basic types — three-tab shingles and architectural (laminated) shingles. Three-tab shingles have a single layer with cut-outs forming three individual tabs. They have a repetitive pattern and are the most common type of shingle used in homes today.
The most popular architectural shingles have two layers of shingle material bonded together, giving them a more dimensional appearance and increased durability. They’re slightly pricier than the standard 3-tab shingle, but they’re less susceptible to moisture leaks and damage.
Another shingle type to consider is cool roof technology, which is designed to reflect the sun’s damaging infrared radiation and reduce heat transfer to your home. This will lower your energy bills and help reduce your carbon footprint.
Some shingles are even designed to be fire-resistant, which is an important consideration for your home’s safety and longevity. Ask your roofing contractor about shingles that have been certified for this, and keep in mind that many insurance companies offer premium discounts for impact-resistant shingle options. When installing shingles, don’t forget to apply an ice and water membrane around any roof penetrations like chimneys, vents, skylights or dormers. It’s also a good idea to install flashing where the roof meets walls and other structures.
Flashing
Flashing is a sheet of impervious material used to prevent water penetration or seepage through walls, or to direct moisture that has penetrated the wall to designated drainage areas. Typically made from metals like aluminum, copper, and galvanized steel, or plastics, there are many different types of flashing to meet specific building needs. There is step flashing, which seals the seam between two different roofing materials; valley flashing, which seals the low point where two roof slopes meet at an angle; and drip edge flashing, which helps to prevent water from gathering along the sides of the roof. There is also counter flashing, which covers step flashing, and vent pipe flashing, which helps to create a watertight seal around vent pipes.
When it comes to walls, there is sill flashing, which is installed above windows and doors; through-wall flashing, which spans the thickness of a wall and directs water through weep holes (or other means of drainage) in the cladding; and kickout flashing, which diverts rainwater away from the wall intersection and into the gutter system.
There is also continuous flashing, which is often found where the sidewall and the roof meet. However, this type of flashing isn’t as effective at preventing leaks as individual pieces of flashing. In addition, continuous flashing is difficult to flex as your home expands and contracts through the seasons. As such, it’s not a recommended flashing type for your roof. If you want to use this type of flashing for your roof, it’s best to have a professional install it. They’ll know how to cut it to the proper size and shape for your wall or roof, as well as how to seal it properly.