Plumbing involves distributing clean drinking water and removing wastewater. It is important for public health, safety, and environmental sustainability.
With proper plumbing systems, homes and businesses can avoid a range of problems, including leaks and clogs. These can lead to expensive repairs or even structural damage. Contact Neighborhood Plumbing now!
Plumbing encompasses the system of pipes, fixtures, and appliances that supply water and remove wastewater from buildings. It is an essential service that ensures clean, safe water for drinking and sanitation, and maintains hygienic conditions in buildings by removing waste and preventing the spread of disease. Plumbing requires a great deal of knowledge, including the use of pipes made from different materials, proper installation techniques, and code compliance.
Understanding the basics of plumbing can help you make better decisions when it comes to maintenance and repair. For example, knowing where your house’s water shut off valve is can save you a lot of stress in the event of an emergency. This valve is usually located near appliances that use water or in the basement. It can stop the flow of water in the event of a leak or flood, which will prevent further damage and allow you to call a plumber.
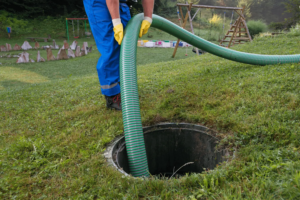
There are three main parts of a plumbing system: supply, drainage, and waste. The supply pipe delivers fresh water into your home, while the drainage pipe removes wastewater and sends it to the sewer system. The waste pipe carries away the solid and liquid waste from toilets, showers, sinks, and washing machines. The drainage and waste systems must be properly connected to the sewer system to avoid backflow and contamination.
Plumbing systems also require a series of valves to control the flow of water and prevent backflow. These include gate valves, ball valves, and check valves. The function of each type of valve depends on the job it is designed to do. For example, a check valve only allows one way for water to pass through while a gate valve is more complex and can be used to regulate the flow of water in a specific direction.
The International Plumbing Code (IPC) sets standards for plumbing design, installation, and maintenance. It helps to prevent contamination of potable water by ensuring that all systems are tested and approved before being put into use. In addition, the IPC helps to ensure that plumbing systems are able to handle the load and pressure they will be subjected to.
Federal and State Regulations
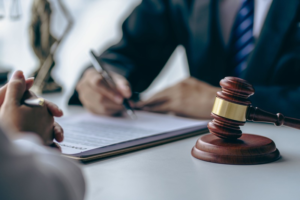
Plumbing is regulated at the state and local levels, and the rules vary from one area to another. Most states require plumbers to obtain a license before performing any work. The licensing requirements usually include education, training and work experience. Some states also require plumbers to carry liability insurance and/or bonds. In addition, many cities and counties have their own specific licensing requirements. For example, New York City requires master plumbers to pass a written exam and a practical exam.
New York plumbers must also have a permit to perform plumbing work in most buildings. This includes both commercial and residential buildings. Depending on the type of project, the permit may be required for installation, repairs or replacements. A permit can also be required for major renovations or remodeling projects. The City’s Department of Buildings issues plumbing permits.
Licensed plumbers must follow national and state regulations for water safety and plumbing installation, including proper water fixture locations. They must also follow standards for backflow prevention and guidelines on the use of thermostatic mixing valves (TMVs). In addition, the Plumber’s Code of Ethics requires plumbers to be honest, fair and respectful to clients.
A career in plumbing can be lucrative and rewarding. Some high schools offer vocational courses that teach students the skills they need for this trade. In addition, BOCES Career and Technical Education programs are available throughout the state. These classes are usually open to juniors and seniors and provide classroom instruction and hands-on training.
The City of New York, for example, requires plumbers to wear a uniform and display a metal sign in their shops. The sign must indicate the plumber’s name and number. A person who engages in the business of plumbing without a permit is subject to fines or even criminal prosecution. However, simple repairs or replacing old faucets, toilets and sinks do not require a permit.
Some states, such as Iowa, require plumbers to have a contractor’s license in order to provide plumbing services. In some cases, the license is specific to plumbing, while in others it is more general and covers multiple types of construction. In the case of New York, a master plumber must be licensed at the city level in addition to having a state-level license. In addition, most states and cities require that contractors register their businesses.
Inspections
Professional plumbing inspections are a critical part of preventative maintenance, helping homeowners avoid major repairs and minimize damage. They can also detect problems that may not be immediately apparent, such as a small leak that could cause water damage and mold growth over time.
A typical plumbing inspection involves checking all of the home’s water supply fixtures and examining pipe lengths, joints, and connections for signs of leaks or damage. The inspector will also check the condition of the water heater and evaluate drain lines, water pressure, and backflow prevention devices. The plumber will also assess gas lines and locate shut-off valves, if applicable.
Plumbing problems can be hidden behind walls or under floors, so a thorough visual examination is necessary to identify issues. A professional plumber will use specialized equipment to locate leaks, clogs, and other problems that may not be visible to the naked eye. This advanced equipment helps to save money by preventing costly emergency repairs and improving efficiency.
In addition to identifying existing problems, a plumber can provide helpful recommendations for future improvements and upgrades. For example, aging pipes may be prone to corrosion and need replacement. A professional plumber can recommend the best options for upgrading to a more durable material that will last longer and reduce the risk of leaks or clogs.
Performing routine plumbing inspections can help prevent costly emergencies such as sewage backups, flooding, and shut-off valve failures. These repairs can be very disruptive and expensive, so it is important to catch them before they worsen. Plumbing inspections can also help homeowners improve the longevity of their water heaters, appliances, and fixtures by identifying wear and tear early on.
Homeowners can prepare for a plumbing inspection by cleaning their fixtures and locating the home’s main shut-off valve. It is also helpful to clear work areas so the plumber can access all parts of the system. By taking a few simple steps, homeowners can make their plumbing inspections go more smoothly and help to ensure a positive outcome. When hiring a plumber for an inspection, it’s important to choose one with experience and good customer reviews. A professional plumber will be able to quickly and efficiently locate any problems, provide estimates, and complete the required repairs in a timely manner.
Installation
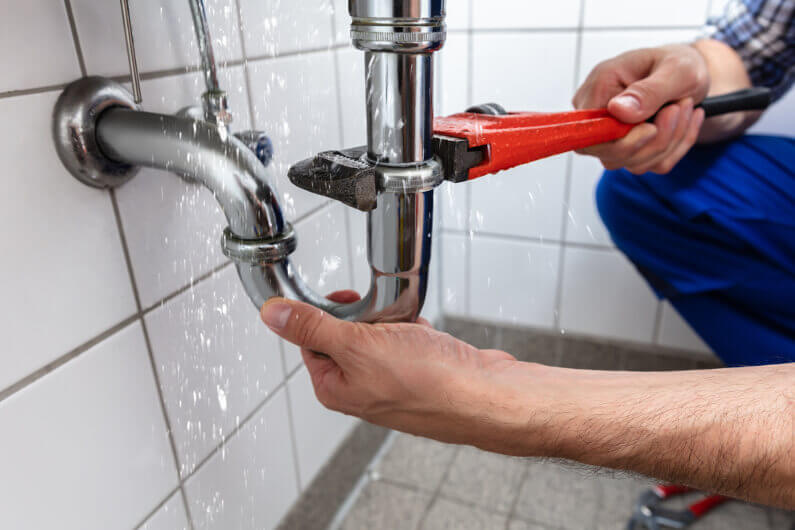
While plumbing is relatively simple in concept, actual installation is a complex task that requires considerable skill and knowledge. The most significant challenge is ensuring that fixtures and pipes fit together properly, without leaks or other problems. This requires precise measurements, careful use of tools and materials, and a thorough understanding of plumbing layouts and plans.
Plumbers must also be familiar with local codes and regulations, which vary from region to region. These typically cover fixture requirements, installation practices, and materials, as well as safety and health considerations. For example, some regions require backflow prevention devices to protect against contaminated water. Others have specific water conservation or seismic safety regulations.
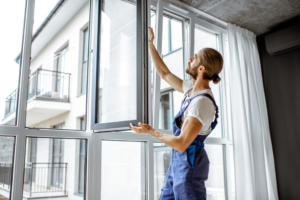
New construction and home improvement projects often involve plumbing installation. This may include installing faucets, toilets, showerheads, sinks, and appliances like dishwashers or washing machines. In some cases, the plumbing contractor may need to alter existing pipe lengths or install a new water heater. The installation process must follow all local and state guidelines.
When working on a new construction project, a plumber starts by setting the sewer accommodation stubs, which connect the house to the municipal sewerage system. This usually happens before the concrete foundation is poured. The next step is to set the piping, which involves cutting away drywall and lifting tiles. After that, the plumber can install the fixtures.
Choosing the right fixtures is crucial for a successful project. For example, choosing a water-efficient dishwasher can save you money on your utility bill. And using PEX piping instead of copper can reduce the risk of leaking pipes in the future.
Plumbing systems have a profound impact on our health and well-being, providing clean drinking water and removing waste in an efficient and safe manner. Proper maintenance and regular inspections can help prevent leaks, water contamination, and other serious problems. For the sake of your health and that of your family, it’s important to hire a professional when installing or repairing your plumbing. This ensures that the work is done correctly and up to code. It also helps to minimize costly repairs down the road.