Ceiling Insulation Perth prevents pollutants like dirt, radon, smoke, and moisture from penetrating the indoor space. These contaminants reduce indoor comfort and can cause mold, mildew, or diseases.
Proper insulation helps to keep indoor temperatures within a comfortable range, saving energy and money. This is especially important in areas that are unheated.
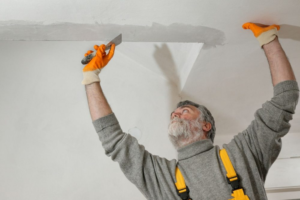
Insulating the ceiling of your home is one of the best ways to reduce unwanted air infiltration, reduce heating and cooling costs, and make your house more comfortable. It also helps prevent outside temperatures from transferring to the inside of your home, which is especially important in Victoria’s alpine climates.
In addition to lowering energy bills, insulating the ceiling of your home will help protect against mold and moisture damage and improve fire safety. The ceiling is an ideal place to install insulation because it provides a barrier between the living areas of your home, the roof space, and the attic area.
If your home has an existing insulated ceiling, it’s worth checking its R-value to see if it is at the recommended level for your particular climate zone. If it isn’t, you can add more or replace it with an appropriate product to achieve the same insulating effect. It’s also a good idea to check that your existing insulation is in good condition. Over time it can lose some of its R-value due to compression and other factors, so you may find that it needs to be topped up or replaced altogether.
When installing new ceiling insulation, it’s important to ensure the installation meets national standards and code of practice to ensure its effectiveness and your potential energy savings. A qualified installer will be able to answer any questions you may have and provide advice about the best type of insulation for your home.
If your ceiling insulation is made from a material such as wool, it’s also a good idea to read the label and choose products with low toxin levels and sustainable manufacturing processes. For example, Earthwool® insulation manufactured using ECOSE Technology is free from the traditional petrochemical-based binders used in other insulation and has no added formaldehyde or acrylics.
The type of ceiling insulation you choose will depend on the R-value you require and your renovation budget. Typically, higher R-values are more expensive but will offer greater thermal resistance. Another consideration is the amount of work involved in installing the insulation and accessing hard-to-reach areas, which can drive up labor costs.
Increases Energy Efficiency
Insulation improves a building’s energy efficiency, reduces utility bills, and makes rooms comfortable year round. It’s one of the most cost effective ways to reduce heat loss in winter and heat gain in summer and should be installed as part of a new build or during major renovations. It’s also very quick and easy to retrofit without a lot of disruption.
As the old saying goes, “heat rises”. In homes that are not well insulated, much of the heated energy in the home escapes through the ceiling. During the summer, a poorly insulated ceiling can make rooms hot and uncomfortable, requiring air conditioners to work overtime to keep temperatures cool.
Having proper insulation in the ceiling keeps air in during the winter and out in the summer, cutting down on heating and cooling costs. It also helps to maintain a consistent indoor temperature throughout the house, reducing HVAC wear and tear.
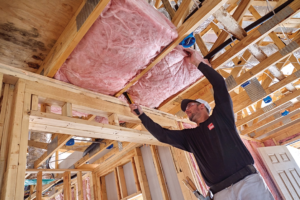
There are many types of insulation available, each with varying R values depending on their thermal resistance. The higher the R value, the more insulative it is. Typically, the most common type of insulation for ceilings is fiberglass batts which are made from recycled glass and sand. They’re usually easy to install and fire retardant, making them an economical choice. Cellulose fibres are another popular option. They’re derived from recycled paper products, are fire retardant, and can be blown into place, making them suitable for difficult-to-reach areas. Rock wool is also an option for ceiling insulation. It’s a fibrous, natural material that has very good insulation properties, is eco-friendly, and can be cut to fit any space.
It’s best to install ceiling insulation before drywall is put up, but it can be done afterward as long as there’s access to the attic space and the joists. In a retrofit project, a vapor barrier is often installed first before installing the insulation to protect against moisture and mold. Insulation should be pushed flush between the joists and around vents, exhaust fans, and chimneys to prevent any gaps.
A properly insulated ceiling isn’t just about saving energy and money; it also increases comfort and contributes to a sustainable future. The energy that insulation saves reduces pollution and ecological grievances.
Reduces Noise
Aside from thermal efficiency, insulating your ceilings can also provide an effective sound barrier, making it quieter and more peaceful in your home. Insulation materials such as fiberglass and cellulose absorb and dampen sound waves, reducing the transfer of noise through walls and ceilings. The thickness and density of insulation are also key factors in its effectiveness as a sound barrier, with higher densities and thicker insulation providing better performance for reducing noise.
For best results, opt for acoustic insulation and install it between the joists in your ceiling, ensuring complete coverage. Additionally, you should consider addressing any voids or gaps in your ceiling, as these can leak air and reduce the effectiveness of your insulation.
How well your insulation performs in reducing noise depends on the type of noise and its frequency and intensity. Insulation materials such as fiberglass and mineral wool are particularly good at absorbing low-frequency noise, while cellulose and foam are excellent for reducing high-frequency noise. You should look for acoustic insulation with a high STC (sound transmission class) rating to get the most benefit from your investment.
Keep in mind that even the highest-performing insulation can bleed noise structurally, so if you are concerned about sound pollution, it may be best to consult a professional acoustic consultant to ensure your insulation is installed properly and effectively. Additionally, electrical wiring should be checked before installation to make sure it can be covered by insulation without compromising its performance or safety.
Installing new ceiling insulation is a great way to improve the comfort and quality of your home, as well as add a significant financial advantage for when you’re ready to sell. Contact Rubcorp today to start the process of transforming your home into an energy-efficient, comfortable and eco-friendly space!
Have you noticed a drop in the effectiveness of your ceiling insulation? Is it time to re-install? Call the experts at Rubcorp to discuss your options for a free consultation. We offer a range of insulation products, from blankets and batts to blown cellulose and fiberglass, all designed to reduce energy costs, increase thermal efficiency, improve acoustic performance, and make your home healthier for you and your family.
Increases Comfort
Ceiling insulation slows down heat transfer, keeping you warm in the winter and cool in the summer. This minimizes temperature variations throughout the house and reduces your energy costs. It also decreases the workload on your air conditioner and increases its life by 10 to 20 years.
Insulation also helps control humidity and prevents mold growth in the attic. Mold grows when warm moist air mixes with cooler surface areas. When insulation is installed correctly, it will prevent this from happening.
There are many types of insulation available to insulate your ceiling. Some are more effective than others. Choose the type of insulation that best meets your needs.
Fiberglass batts are a popular choice for homeowners and builders due to their cost effectiveness, R-value and easy installation. They can be installed between floors, walls and ceilings, providing a thermal barrier and improving energy efficiency in any home. These insulation products are pre-cut to fit most attic joist centers. They are available in various thicknesses to suit different climate requirements and are made from recycled glass and a sustainable, formaldehyde-free binder known as ECOSE Technology.
Polyurethane foam boards are another great option for insulating your attic. This product has an excellent R-value and provides a strong vapor barrier as well as sound dampening. It is a good choice for vaulted and cathedral ceilings where space is limited. It is easy to cut, install and has a low fire rating requirement.
Mineral (rock or slag) wool and other natural fibers are also a choice of insulation. These products have a high R-value and come in varying thicknesses to meet specific performance levels. They are a good choice for both new construction and renovations. They are non-allergenic, environmentally friendly and have a higher flammability resistance than other options.
Spray foam is a more comprehensive insulation option that is ideal for attics and walls. This product can be sprayed in between the ceiling and drywall or between the floor and attic. It provides a solid air seal and is suitable for all applications including new construction, renovations and commercial buildings. It is easy to install and has a fast turnaround.